
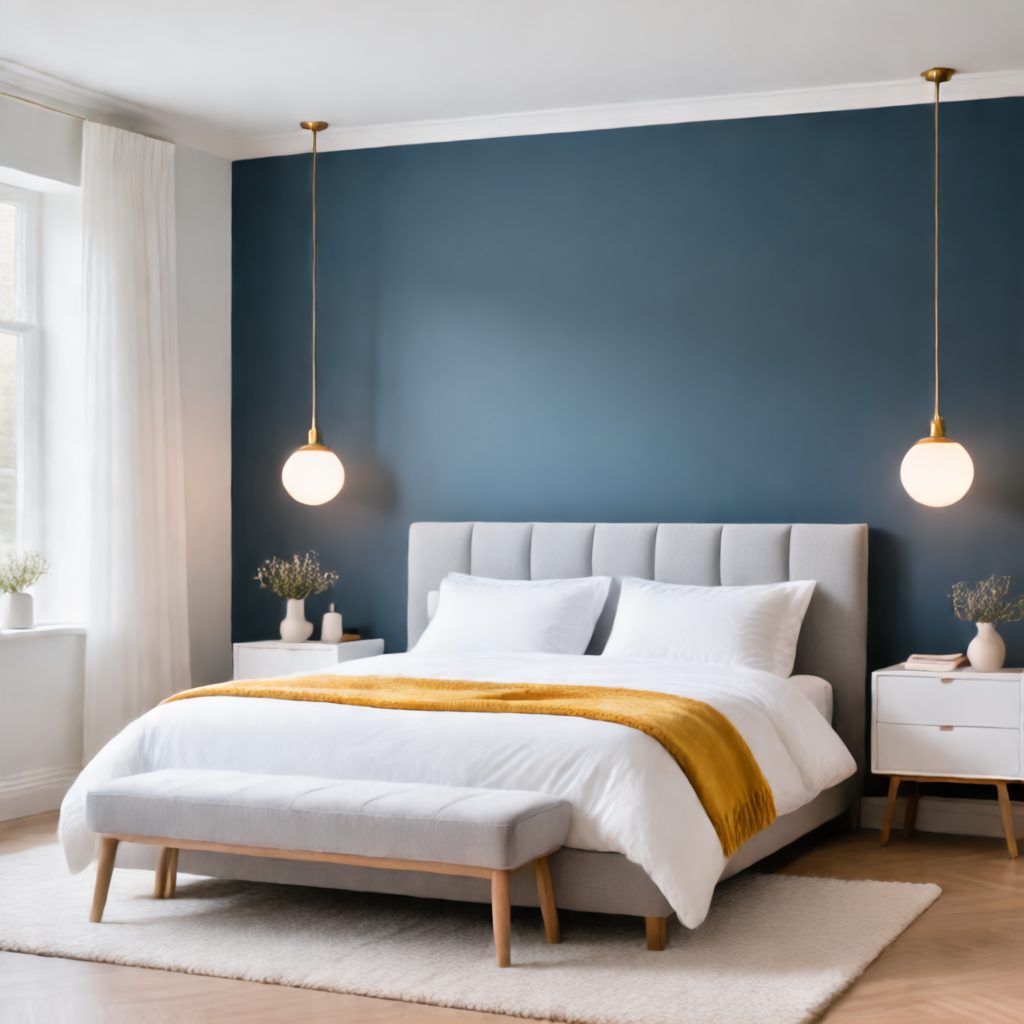
Queen Size Bed Storage for Studio Apartments: 11 Space-Saving Ideas That Actually Work in 2025
Living in a studio apartment with a queen-size bed? You’re not alone! Nearly 13% of renters in major cities live in studio apartments, yet most still want the comfort of a spacious bed. Here’s the challenge: how do you fit a queen bed AND have enough storage in a space that’s typically under 600 square feet?
I’ve been there myself – staring at my beautiful queen bed while clothes pile up on the single chair because there’s simply nowhere else to put them. The good news? With the right storage strategies, your queen bed can become the ultimate space-saving hero rather than a storage obstacle. Let’s dive into proven solutions that’ll transform your studio from cramped to cleverly organised! Shop Ottoman Beds Collection
Why Queen Beds Are Actually Perfect for Studio Apartment Storage
More Under-Bed Storage Space Than You’d Think
• 33 square feet of hidden storage potential – That’s what you get underneath a queen bed, compared to just 18 square feet with a double bed. I measured this myself after getting fed up with cramped storage solutions.
• Perfect for bulky items – Winter duvets, out-of-season clothes, and those random boxes you can’t bear to throw away all fit comfortably. My mate with a single bed is constantly playing storage Tetris, whilst I just slide everything under mine.
• Easy access from multiple sides – Unlike smaller beds pushed against walls, queen beds often sit away from walls, giving you access from three sides. Makes retrieving stuff so much easier than crawling around on your hands and knees.
Height Creates Vertical Storage Opportunities
• 14+ inches of clearance is the sweet spot – I learnt this after buying a gorgeous low-profile bed that was completely useless for storage. Now I can fit proper storage containers, not just flat boxes that fall apart after six months.
• Stackable storage solutions work brilliantly – You can actually stack storage boxes two-high under a properly elevated queen bed. Try doing that with a cramped double bed frame.
• Room for furniture pieces – I’ve got a small filing cabinet and a mini chest of drawers living under there. It’s like having a secret office space that guests never see.
Platform Queens Replace Multiple Furniture Pieces
• Built-in drawers eliminate the need for separate storage – My platform bed has six drawers total, which means I ditched my old chest of drawers and bedside tables. That freed up loads of floor space for other things.
• Integrated headboard storage – Some platform queens come with shelving built into the headboard. Perfect for books, charging stations, and all those bits you need within arm’s reach.
• One purchase instead of five – Instead of buying a bed frame, mattress, drawers, bedside tables, and storage ottoman separately, you get it all in one piece. Saves money and decision fatigue.
Strategic Placement Maximises Floor Space
• Against the longest wall works best – This leaves your shorter walls free for desks, wardrobes, or seating areas. Most people do the opposite and wonder why their studio feels like a corridor.
• Creates defined zones in your studio – The bed becomes a natural room divider, separating your sleeping area from your living space. Makes the whole flat feel more organised.
• Allows for proper traffic flow – With a queen positioned correctly, you’re not constantly squeezing around furniture. There’s actually space to move about, which makes the studio feel bigger than it is.
The bottom line? Everyone told me a queen bed would make my studio feel cramped, but it’s actually made it more functional. Sometimes bigger really is better, especially when it comes to storage solutions. Shop Lizzy Ottoman Bed
Under-Bed Storage Solutions That Maximise Every Inch
Rolling Storage Bins Are Your Best Mate
• Wheels make all the difference – I used to drag heavy plastic boxes out from under my bed like some sort of caveman. Then I discovered rolling storage bins, and honestly, it changed my life. No more scraped knuckles or pulled muscles.
• Clear sides for easy identification – Nothing worse than pulling out three different boxes to find your Christmas decorations. I learned this after spending twenty minutes hunting for my winter boots in identical opaque containers.
• Seasonal rotation becomes effortless – Every six months, I just roll out the summer stuff and roll in the winter gear. Takes about ten minutes instead of the hour-long ordeal it used to be with regular boxes.
• Different sizes for different needs – I’ve got massive ones for duvets and smaller ones for shoes. The key is measuring your under-bed space first – I made the rookie mistake of buying containers that were too tall and had to return half of them.
Vacuum-Sealed Bags Are Space-Saving Magic
• Compress bulky items by 75% – My winter duvet used to take up an entire storage box. Now it fits in a bag the size of a large book. It’s like having a shrinking machine for your belongings.
• Perfect for out-of-season clothing – I can fit three months’ worth of winter jumpers in one vacuum bag. Just make sure you’ve got a decent vacuum cleaner – my old one barely had enough suction and the bags kept re-inflating.
• Protects against dust and moisture – Found this out the hard way when I stored some expensive wool coats in regular bags and they came out covered in dust bunnies. Vacuum bags keep everything pristine.
• Label everything clearly – Trust me on this one. After six months, you won’t remember which bag contains what. I use a label maker now, but even masking tape and a Sharpie work fine.
Sliding Drawer Systems for Daily Essentials
• Easy access without moving the bed – These are brilliant for things you need regularly. I’ve got one with all my workout gear, so I can grab my trainers without doing gymnastics under the bed frame.
• Soft-close mechanisms prevent slamming – Learned this after my cheap drawer system kept slamming shut and waking up my downstairs neighbour. Worth spending a bit extra for the quiet operation.
• Modular systems grow with your needs – Started with two drawers, now I’ve got four. Most systems let you add more units as you figure out what works best for your space.
• Weight capacity matters – Don’t make my mistake of overloading the first drawer I bought. It collapsed spectacularly, spilling books everywhere. Check the weight limits before you start filling them up.
Custom-Built Platforms for Awkward Spaces
• DIY solutions for weird bed frames – My bed has these annoying support legs right in the middle, making standard storage impossible. Built a simple wooden platform that bridges the gap – cost about £30 and an afternoon’s work.
• Maximises every inch of available space – Shop-bought storage rarely fits perfectly. A custom platform means you’re using 100% of your under-bed real estate instead of leaving dead space around the edges.
• Adjustable height for different items – Made mine with removable sections so I can store tall items in some areas and flat boxes in others. It’s like having a custom wardrobe under your bed.
• Basic woodworking skills required – Don’t worry, you don’t need to be Bob the Builder. I watched three YouTube videos and managed it with just a saw, drill, and some wood glue. If I can do it, anyone can.
The trick with under-bed storage is thinking beyond just shoving boxes under there. With the right systems, that space becomes as organised and accessible as any proper wardrobe. Shop Sophia Ottoman Bed
Platform Beds with Built-In Storage: Your Studio’s Best Friend
Hydraulic Lift Storage Beds Are Absolute Game Changers
• Entire mattress lifts up like a car bonnet – First time I saw one of these in action, I was properly gobsmacked. The whole bed top just rises up smoothly, revealing this massive storage cavern underneath. It’s like having a secret bunker in your bedroom.
• Store bulky items you rarely need – I keep my suitcases, spare pillows, and that box of uni textbooks I can’t bring myself to throw away. The storage space is enormous – it easily fits a small wardrobe’s worth of stuff.
• Gas struts do all the heavy lifting – No more struggling to lift a heavy mattress with one hand whilst trying to grab something with the other. The hydraulic system makes it effortless, even for someone like me who struggles opening pickle jars.
• Safety features prevent accidents – Mine has a soft-close mechanism that stops the bed slamming down if you let go. Learned to appreciate this after nearly crushing my laptop when the old manual lift bed came crashing down.
Integrated Drawers and Compartments for Daily Use
• Multiple storage zones in one piece – My platform bed has six drawers total – three on each side. It’s replaced my chest of drawers, bedside tables, and that random storage ottoman I used to have cluttering up the corner.
• Different-sized compartments for different needs – The deep drawers hold jumpers and jeans, whilst the shallow ones are perfect for underwear and socks. No more digging through one massive drawer trying to find matching socks.
• Soft-close drawer slides are worth the extra cost – Cheap drawers slam shut and wake the neighbours. Trust me, I’ve been there. The good ones glide silently and feel properly luxurious.
• Easy assembly despite looking complicated – Took me about four hours to put together, and I’m not exactly handy. The instructions were actually decent, and most pieces just slot together with cam bolts.
Ottoman Storage Beds Double Your Furniture
• Seating area at the foot of the bed – Brilliant for putting on shoes or having somewhere for guests to sit. My studio doesn’t have room for a proper sofa, so this ottoman section gets used constantly.
• Hidden storage inside the ottoman – Perfect for things like spare bedding, books, or that random collection of cables we all seem to accumulate. The lid lifts up easily, and there’s loads of space inside.
• Creates a natural room divider – The ottoman bit helps separate the sleeping area from the rest of the studio. Makes the whole space feel more organised and less like you’re living in one big room.
• Upholstered tops are more comfortable – Learned this after sitting on a hard wooden ottoman for months. Spent an extra £50 for padded upholstery and my back thanked me for it.
DIY Platform Bed Solutions for Tight Budgets
• IKEA hacks save hundreds of pounds – Built mine using IKEA kitchen cabinets as the base and a piece of plywood on top. The total cost was about £200 instead of the £800 for a proper platform bed. Looks almost identical too.
• Basic tools and weekend project – You’ll need a drill, saw, and some patience. Took me two full days, but that included multiple trips to the hardware store because I kept forgetting screws.
• Customise storage to your exact needs – Shop-bought beds have fixed drawer sizes, but with DIY, you can make compartments exactly the right size for your stuff. Made one section specifically for my guitar case.
• Modular design means easy moving – Built mine in sections that bolt together, so when I eventually move house, I can take it apart and reassemble it. Much easier than trying to get a massive bed frame up narrow stairs.
The beauty of platform beds is that they’re not just furniture – they’re storage systems disguised as beds. In a studio apartment, every piece of furniture needs to work twice as hard, and these definitely deliver on that front. Shop Evie Ottoman Bed
Headboard Storage Ideas That Double Your Space
Floating Shelves Integrated Into Headboard Design
• Built-in look without the massive cost – I mounted three floating shelves directly above my bed to create a custom headboard effect. Cost me about £40 total, compared to the £300 headboards I was looking at online. Looks like it was designed that way from the start.
• Perfect height for bedtime essentials – Phone charger, water bottle, book, and that lip balm I’m always losing – everything’s within arm’s reach without cluttering up the bedside table. No more fumbling around in the dark trying to find my glasses.
• Weight distribution is crucial – I made the mistake of putting heavy books on the shelf directly above my head. Woke up one night convinced the whole thing was going to collapse on me. Now I keep lighter items up there and heavier stuff on the side shelves.
• LED strip lighting transforms the whole vibe – Added battery-powered LED strips under each shelf for ambient lighting. Creates this lovely warm glow for reading and makes the whole headboard area feel like a proper feature wall.
Bookshelf Headboards Are Brilliant Multi-Taskers
• Floor-to-ceiling storage behind your bed – My bookshelf headboard goes right up to the ceiling, giving me storage space I never knew I needed. It’s like having a library wall that happens to have a bed in front of it.
• Earthquake-proofing is essential – Learned this the hard way when a particularly heavy atlas came tumbling down during the night. Now everything’s secured with bookends or those little clear book supports. Safety first, especially when you’re sleeping underneath.
• Mix books with decorative items – All the books look a bit overwhelming, so I’ve scattered in some plants, photo frames, and random ornaments. Makes it feel more like a feature wall than just storage.
• Access from both sides if positioned correctly – Mine’s positioned so I can reach books from either side of the bed. Brilliant for when you finish a book and want to grab another without getting up.
Hidden Compartment Headboards for Valuables
• Secret storage nobody knows about – My headboard has a hidden compartment behind a fake panel where I keep important documents, spare cash, and my grandmother’s jewellery. Guests have no idea it’s even there.
• Magnetic locks are surprisingly secure – The compartment opens with a hidden magnetic key that looks like a decorative element. Much more secure than those obvious little locks that scream “valuable stuff inside.”
• Perfect size for flat items – Passports, certificates, spare keys, and that USB drive with all my photos fit perfectly. Not suitable for bulky items, but ideal for things you need to keep safe but accessible.
• DIY version using picture frames – Made a fake picture frame that hinges open to reveal a shallow compartment. It costs about £15 and an afternoon’s work. Looks like normal wall art, but hides my emergency cash stash.
Wall-Mounted Storage Cubes Around the Bed Area
• Asymmetrical arrangements look more interesting – Started with a symmetrical setup, but it looked too formal and hotel-like. Now I’ve got cubes at different heights and angles – much more visually appealing and feels more personal.
• Different cube sizes for different purposes – Small cubes for everyday items like phone chargers and hand cream, larger ones for books and decorative bits. The variety makes the whole wall more functional and interesting to look at.
• Floating cubes create depth – Mounted some cubes further out from the wall than others to create this layered effect. Makes the whole headboard area feel more three-dimensional instead of just flat storage stuck to the wall.
• Cable management is a nightmare – All those phone chargers and lamp cords can look messy quickly. Invested in some cable tidies and cord covers to keep everything looking clean. Makes a massive difference to the overall appearance.
The brilliant thing about headboard storage is it uses wall space that’s usually completely wasted. Instead of just having a boring blank wall behind your bed, you’re creating functional storage that actually makes the room look more interesting. Plus, everything’s right there when you need it most – when you’re lying in bed being lazy on a Sunday morning. Shop Lunar Ottoman Bed
Vertical Storage Solutions Around Your Queen Bed
Floor-to-Ceiling Shelving Units as Room Dividers
• Creates separate zones in your studio – I positioned a tall IKEA shelving unit perpendicular to my bed, and it completely transformed the space. Suddenly, I had a proper sleeping area and a living area, instead of one big room where everything blended together.
• Open shelving keeps the space feeling airy – Solid room dividers make studios feel cramped, but open shelving lets light flow through whilst still creating that visual separation. You get the benefits of defined spaces without losing the open feel.
• Access storage from both sides – Brilliant design feature that most people don’t think about. I can grab books from the bedroom side and office supplies from the living area side. It’s like having two storage units in the space of one.
• Anchor to the ceiling for safety – Made this mistake early on and nearly had the whole unit topple over when I was rearranging the top shelf. Now it’s properly secured to both floor and ceiling – much safer and more stable.
Wall-Mounted Cabinets and Floating Shelves
• Maximise wall space without losing floor area – Every inch of floor space counts in a studio, so going vertical is essential. I’ve got floating shelves running along two walls at different heights – looks like a modern art installation but stores loads of stuff.
• Mix closed and open storage – Some things look great on display, others need hiding away. I alternate between floating shelves for books and plants, and wall-mounted cabinets with doors for all the random bits that would look messy on open shelves.
• Height placement matters for daily use – Keep frequently used items at eye level or just above. I learned this after putting my coffee supplies on a shelf I needed a step ladder to reach. Now my morning routine doesn’t require gymnastics.
• Weight limits are real – Overloaded a floating shelf with heavy textbooks, and it pulled right out of the wall, taking a chunk of plaster with it. Always check the weight capacity and use proper wall anchors, especially in older buildings.
Over-Bed Storage Canopies and Hanging Organisers
• Suspended storage above the bed – Sounds mental, but it actually works brilliantly. I’ve got a hanging organiser suspended from the ceiling above the foot of my bed for things like spare pillows and throws. Completely out of the way but easily accessible.
• Ceiling-mounted rails for hanging storage – Installed a simple rail system that lets me hang fabric organisers at different heights. Perfect for seasonal clothes or items I don’t need daily access to. Much cheaper than built-in wardrobes.
• Safety considerations are crucial – Everything needs to be properly secured because the last thing you want is storage falling on your head whilst you sleep. I use heavy-duty ceiling hooks rated for way more weight than I actually need.
• Fabric organisers look softer than hard storage – Hanging canvas or fabric storage bags feel less industrial than plastic containers. Makes the whole setup look more intentional and less like you’re living in a warehouse.
Tall Wardrobes and Armoires for Clothing Storage
• Go as high as your ceiling allows – My wardrobe goes right up to the 9-foot ceiling, giving me storage space I never would have had with a standard height unit. The top section holds out-of-season clothes and spare bedding.
• Narrow and tall beats wide and short – Studio apartments need furniture that goes up, not out. My wardrobe is only 60cm wide but nearly 3 metres tall. Takes up minimal floor space but stores everything I own.
• Internal organisation systems are essential – A tall wardrobe without proper internal storage becomes a black hole where clothes go to die. I’ve got adjustable shelves, hanging rails at different heights, and drawer inserts to maximise every inch.
• Position away from the bed for better flow – Initially, I had my wardrobe right next to the bed, which made the sleeping area feel cramped. Moved it to the opposite wall and suddenly the whole studio felt more spacious and organised.
The key with vertical storage is thinking in three dimensions instead of just floor space. When you’ve only got 400 square feet to work with, those walls and ceiling space become incredibly valuable real estate. Every vertical inch you can utilise means more floor space for actually living in your studio. Shop Isla Ottoman Bed
Multi-Functional Furniture That Works with Queen Beds
Storage Ottomans and Benches at the Foot of the Bed
• Perfect spot for putting on shoes and socks – Can’t tell you how many mornings I used to balance on one foot trying to put trainers on. Now I’ve got a proper bench at the foot of my bed, and getting dressed is actually civilised instead of a daily balancing act.
• Hidden storage for bulky items – My ottoman holds spare duvets, extra pillows, and that massive winter coat I only wear twice a year. It’s like having a secret wardrobe that doubles as furniture. Guests sit on it without realising they’re perched on top of half my belongings.
• Creates a natural boundary – The bench helps define where the bedroom area ends, which is brilliant in a studio where everything tends to blend together. Makes the space feel more organised and intentional rather than just one big room with a bed plonked in it.
• Weight capacity varies massively – Learned this when my cheap ottoman collapsed under my mate, who’s a bit on the heavy side. Now I always check the weight rating – you want something that can handle people sitting on it properly, not just decorative storage.
Bedside Tables with Multiple Drawers and Compartments
• Charging stations built right in – My bedside table has a built-in USB hub and cable management system. No more tangled charger cables or hunting for plugs in the dark. Everything charges neatly in one designated spot.
• Different-sized compartments for different needs – Top drawer for daily essentials like glasses and lip balm, deeper drawer for books and notebooks, and a hidden compartment for things I don’t want guests stumbling across. It’s like having a filing system next to your bed.
• Closed storage keeps things looking tidy – Open shelves on bedside tables just become dumping grounds for random stuff. Drawers force you to actually organise things and keep the bedroom looking clean and uncluttered.
• Height matters for comfort – I made the mistake of buying bedside tables that were too low, so I was constantly reaching down for my water glass. The top should be roughly level with your mattress for easy access without straining.
Folding Desks That Tuck Away When Not in Use
• Wall-mounted desks save massive floor space – My fold-down desk takes up zero floor space when not in use, but gives me a proper workspace when I need it. Brilliant for studios where you can’t dedicate permanent space to an office area.
• Sturdy enough for proper work – Was sceptical about whether a folding desk would be stable enough for my laptop and paperwork, but the wall-mounted bracket system is surprisingly solid. It can even handle my heavy monitor without wobbling.
• Cable management is tricky but doable – Took some planning to route power cables and internet connections to a desk that folds away. Used cable clips and a small cable tidy box mounted under the desk to keep everything organised.
• Perfect height adjustment – Unlike fixed desks, you can mount folding desks at exactly the right height for your chair and posture. Mine’s positioned perfectly for working whilst sitting on my bed when I can’t be bothered setting up the proper chair.
Storage Ladders for Accessing High Shelves and Loft Areas
• Doubles as decorative storage – My storage ladder has wide steps that hold books, plants, and decorative bits when it’s not being used for climbing. Looks intentional rather than just a functional tool leaning against the wall.
• Essential for high ceiling storage – With 10-foot ceilings, I needed something to reach the top shelves safely. The storage ladder is much more stable than a step stool and can handle heavier items when I’m reorganising up there.
• Wheels make it portable – Mine has small wheels on the bottom so I can easily move it around the studio to access different high storage areas. Much better than having multiple step stools cluttering up the space.
• Safety features prevent accidents – Look for ladders with non-slip steps and proper handholds. I initially bought a basic wooden ladder that was terrifying to climb with anything in your hands. The upgraded version with safety features was worth every penny.
The brilliant thing about multi-functional furniture is that every piece earns its place by doing multiple jobs. In a studio apartment, you simply can’t afford to have furniture that only serves one purpose. When your ottoman stores stuff AND provides seating AND helps define your space, that’s when small space living actually starts working properly instead of feeling like a constant compromise. Shop Sam Ottoman Bed
Organisation Systems for Small Bedroom Storage
Closet Organisation Systems and Space-Saving Hangers
• Velvet hangers are absolute game changers – Switched from those chunky plastic hangers to slim velvet ones and instantly gained about 30% more hanging space. Plus, clothes actually stay put instead of sliding off onto the floor every time you grab something.
• Double hanging rods maximise vertical space – Installed a second rod underneath the main one for shorter items like shirts and skirts. Suddenly, my tiny wardrobe could hold twice as much stuff. Wish I’d done this years ago instead of cramming everything onto one level.
• Cascading hangers for similar items – These little hooks let you hang multiple items vertically from one hanger. Brilliant for work shirts or dresses – keeps everything visible and accessible without taking up loads of horizontal space.
• Over-door organisers utilise wasted space – The back of my wardrobe door now holds shoes, accessories, and cleaning supplies. It’s like discovering a secret storage area that was hiding in plain sight. Just make sure the door can still close properly with everything hanging on it.
Drawer Dividers and Compartment Organisers
• Adjustable dividers beat fixed compartments – Started with those rigid plastic organisers that never quite fit my drawers properly. Adjustable fabric dividers are so much better – you can customise the compartment sizes based on what you actually own.
• Separate everything into categories – Used to just chuck all my underwear and socks into one drawer like some sort of clothing soup. Now everything has its own section, and getting dressed takes half the time because I’m not digging through piles of random stuff.
• Bamboo organisers look much nicer – Plastic drawer dividers always looked a bit cheap and temporary. Invested in bamboo ones that actually look good when the drawer’s open. Makes the whole organisation system feel more permanent and intentional.
• Deep drawers need multiple levels – My bottom drawer is quite deep, so I use stackable organisers to create two levels of storage. Bottom level for bulky jumpers, top level for smaller items. Maximises every inch of available space.
Clear Storage Containers for Easy Identification
• See-through beats guessing every time – Cannot stress this enough. Spent months opening random boxes trying to find my winter scarves before switching to clear containers. Now I can spot exactly what I need from across the room.
• Airtight seals protect against dust and moisture – My old cardboard boxes were useless against the damp in my ground floor flat. Clear plastic containers with proper seals keep everything fresh and clean, especially important for seasonal clothes storage.
• Stackable designs save vertical space – Got containers that nest together perfectly when empty and stack securely when full. Much more space-efficient than random boxes of different sizes that never quite fit together properly.
• Different sizes for different categories – Small containers for accessories and belts, medium ones for shoes, large ones for bulky winter coats. Having the right size container for each type of item makes everything so much more organised and accessible.
Labelling Systems for Quick Access and Maintenance
• Label maker was the best £20 I ever spent – Sounds obsessive, but proper labels make such a difference. No more opening three different boxes to find my gym gear. Everything’s clearly marked and easy to locate, even when I’m rushing.
• Photos work better than words sometimes – For containers stored up high or in awkward spots, I stick a photo of the contents on the outside. Much quicker to spot than reading text, especially when you’re looking up at shelves above eye level.
• Colour coding speeds up the system – Blue labels for winter stuff, green for summer, red for important documents. Sounds a bit mental, but it genuinely makes finding things faster when you’re in a hurry.
• Update labels when contents change – Made the mistake of not updating labels when I reorganised, which defeated the whole purpose. Now I keep spare labels handy and update them immediately when I move things around.
The key with organisational systems is starting simple and building up. I tried to implement everything at once initially, and it was overwhelming. Much better to tackle one area at a time – maybe start with just the sock drawer – and gradually expand the system as you figure out what works for your specific space and habits. The goal isn’t to have the most elaborate organisation system, it’s to have one that actually makes your daily life easier. Shop Pearl Ottoman Bed
Conclusion
Creating effective storage around your queen-size bed in a studio apartment isn’t just possible – it’s a game-changer for your entire living experience. From utilising every inch under your bed to choosing multi-functional furniture pieces, these strategies prove that you don’t have to sacrifice comfort for organisation.
Remember, the key is thinking vertically and choosing pieces that serve multiple purposes. Start with one or two solutions that fit your budget and lifestyle, then gradually build your storage system. Your future self will thank you when you’re living in a clutter-free, organised space that feels twice as large!
Ready to transform your studio? Pick your favourite storage solution from this list and start implementing it this weekend. Your queen bed is about to become the storage superhero your small space has been waiting for! Shop Luka Ottoman Bed
Frequently Asked Questions: Queen Size Bed Storage for Studio Apartments
1. How much storage space does a queen-size bed actually provide in a studio apartment?
A queen-size bed provides approximately 33 square feet of under-bed storage space, which is nearly double the storage capacity of smaller bed sizes in studio apartments.
The actual storage capacity depends on several factors:
- Bed frame height – Frames with 14+ inches of clearance offer maximum storage potential
- Platform bed design – Built-in drawers can add 6-12 cubic feet of additional storage
- Ottoman lift mechanism – Hydraulic lift beds provide access to the entire under-bed area
- Headboard storage integration – Floating shelves and compartments add vertical storage space
For studio apartment living, this translates to storing seasonal clothing, spare bedding, shoes, books, and even small furniture pieces. The key is choosing space-saving storage solutions like vacuum-sealed bags, rolling storage bins, and modular drawer systems that maximise every inch of available space.
2. What are the best under-bed storage solutions for queen beds in small spaces?
The best under-bed storage solutions for queen beds in small spaces include rolling storage bins, vacuum-sealed bags, sliding drawer systems, and custom-built platforms.
Here are the top storage options ranked by effectiveness:
- Rolling storage containers – Easy access with wheels, clear sides for visibility
- Vacuum-sealed storage bags – Compress bulky items by up to 75%, perfect for seasonal clothes
- Sliding drawer systems – Modular design with soft-close mechanisms for daily essentials
- Custom wooden platforms – DIY solutions for awkward bed frame configurations
- Stackable storage boxes – Maximise vertical space under higher bed frames
For studio apartment storage, combine multiple solutions: use vacuum bags for out-of-season clothing, rolling bins for frequently accessed items, and drawer systems for bedroom organisation. This multi-functional approach ensures you’re utilising every inch of under-bed real estate whilst maintaining easy access to your belongings.
3. Are platform beds with built-in storage better than regular queen beds for studios?
Platform beds with built-in storage are significantly better than regular queen beds for studio apartments because they eliminate the need for separate storage furniture while maximising floor space.
Key advantages of platform storage beds include:
- Multi-functional design – Replaces bed frame, drawers, and bedside tables in one piece
- Hydraulic lift mechanisms – Provide access to massive storage caverns beneath the mattress
- Integrated drawer systems – Offer organised compartments for different types of belongings
- Space efficiency – Free up floor area for other essential studio apartment furniture
- Cost effectiveness – One purchase instead of buying multiple storage pieces separately
For small space living, platform beds with ottoman storage or built-in drawers are particularly valuable. They create defined sleeping zones whilst providing hidden storage for everything from spare bedding to important documents. The elevated design also allows for additional under-bed storage solutions, making it the ultimate space-saving furniture choice for studio apartments.
4. How do you maximise vertical storage around a queen bed in a studio apartment?
Maximising vertical storage around a queen bed in a studio apartment involves using floor-to-ceiling shelving, wall-mounted cabinets, headboard storage, and over-bed hanging organisers.
Effective vertical storage strategies include:
- Floor-to-ceiling shelving units – Act as room dividers whilst providing dual-sided storage access
- Wall-mounted floating shelves – Utilise wall space without consuming floor area
- Headboard storage integration – Add floating shelves, bookshelf headboards, or hidden compartments
- Over-bed storage canopies – Suspend fabric organisers from ceiling-mounted rails
- Tall wardrobes and armoires – Choose narrow, high units that go up rather than out
For studio apartment organisation, position tall storage furniture away from the bed to maintain proper traffic flow. Use the wall space above and around your queen bed for frequently accessed items, keeping heavier storage solutions at lower levels for safety. This vertical approach can effectively double your storage capacity without sacrificing valuable floor space.
5. What’s the most budget-friendly way to add storage to a queen bed setup?
The most budget-friendly way to add storage to a queen bed setup is through DIY solutions using repurposed items, basic tools, and pound shop organisers.
Cost-effective storage hacks include:
- Repurposed everyday items – Shoe boxes as drawer dividers, ice cream tubs for under-bed storage
- DIY wooden platforms – Custom-built solutions using basic tools and hardware store materials
- Upcycled furniture projects – Transform old suitcases into storage ottomans, ladders into bookshelves
- Pound shop organisation – Plastic baskets, tension rods, and sticky hooks for instant storage
- IKEA furniture hacks – Use kitchen cabinets as platform bed bases for significant savings
For studio apartment storage on a tight budget, start with free solutions like wine boxes as floating shelves or mason jars for small item organisation. Gradually invest in basic tools to create custom storage platforms and drawer systems. This approach allows you to build a comprehensive bedroom storage system for under £100, compared to hundreds for shop-bought storage furniture.