

The Ultimate 2025 Guide to Organizing Your King Size Ottoman Bed
Did you know that the average person spends about one-third of their life in bed? That’s right! With so much time spent in our sleeping sanctuaries, it’s no wonder that multifunctional furniture like king size ottoman beds have become a game-changer for modern living spaces. I’ve personally transformed my bedroom from a cluttered mess to an organized haven thanks to my ottoman bed’s hidden storage capabilities! According to a recent home organization survey, 78% of homeowners cite “lack of storage space” as their number one home frustration. Well, not anymore!
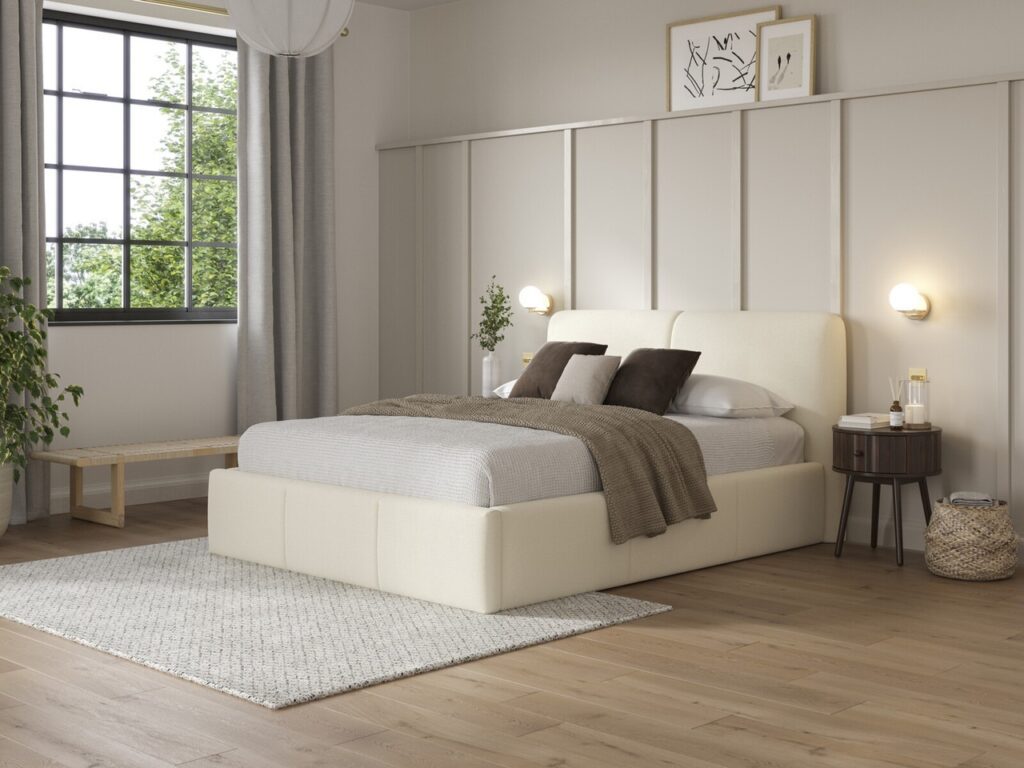
Transform your bedroom today with our bestselling Sophia Ottoman Bed Frame and enjoy the perfect balance of comfort and organization!
Your king size ottoman bed is more than just a comfortable place to rest—it’s a treasure trove of untapped storage potential waiting to be maximized. In this comprehensive guide, we’ll explore ingenious storage systems and organization techniques that will help you transform that cavernous space beneath your mattress into an efficiently organized storage solution for various household items. Ready to transform your bedroom with an elegant storage solution? Explore our Aniya Ottoman Bed Frame and reclaim your space with style! Ready to transform your bedroom with an elegant storage solution? Explore our Aniya Ottoman Bed Frame and reclaim your space with style!
Understanding Your King Size Ottoman Bed Storage Capacity
Let me tell you, when I first purchased my king size ottoman bed three years ago, I was proper chuffed about all the extra storage space—until I tried cramming absolutely everything I owned underneath it! Big mistake. I learned the hard way that understanding the actual capacity of these beds is crucial before you start organizing.
My first weekend with the new bed, I enthusiastically lifted the mattress and started shoving in everything from winter duvets to my embarrassingly large collection of holiday decorations. Two days later, I heard an alarming crack when opening it. Turned out I’d overloaded the hydraulic pistons! The repair wasn’t cheap, and I felt like a right muppet explaining what happened to the furniture technician.
Most king size ottoman beds offer between 25-35 cubic feet of storage space, which is roughly equivalent to a small garden shed. Impressive, innit? Standard dimensions typically hover around 150cm x 200cm (5′ x 6’6″) for the mattress area, with an internal storage depth of approximately 20-30cm depending on the model. But here’s what the adverts don’t tell you—usable space varies dramatically based on the frame design and lifting mechanism.
Speaking of mechanisms, they’re not all created equal! I’ve now owned both side-lift and end-lift varieties, and there’s a massive difference in accessibility. My current end-lift model opens from the foot of the bed, which means items at the head end are bloomin’ difficult to reach without completely removing the mattress. Dead annoying when you need something in a hurry!
Side-lift models, which I reckon are better for most people, open from either the left or right side (or sometimes both), giving you easier access to specific items without disturbing everything else. There’s also half-lift options that only raise part of the mattress—great for smaller spaces but obviously limiting your storage volume.
The weight capacity is something I wish someone had properly explained to me before my costly mistake. Most king size ottoman beds can handle between 40-50kg of evenly distributed storage. That might sound like a lot, but it adds up quickly! Heavy winter duvets, multiple sets of bedding, and those boxes of books I thought would be fine to store—they all contributed to overloading the mechanism.
One thing I’ve learned is to place heavier items toward the hinged side of the bed rather than the lifting end. This reduces strain on the pistons and prevents premature wear. I’ve also discovered that some items are simply not suitable for ottoman storage, regardless of how tempting it is to hide them away. My husband’s bowling ball collection? Definite no-go!
King Size Ottoman Bed Storage Capacity: What Can You Really Fit
For anyone wanting to maximize their ottoman bed’s potential, here’s my tried-and-tested measuring technique: First, measure the internal dimensions rather than relying on external measurements or manufacturer specs. There’s often a surprising difference! I use a tape measure to check the clear internal height, width, and depth, accounting for any internal supports or cross-beams that might reduce usable space.
Another tip—draw a quick diagram of your bed’s storage area and divide it into zones based on accessibility. For my end-lift model, I’ve created a “frequently accessed” zone near the opening end and a “seasonal storage” zone toward the head of the bed. This simple mapping has saved me countless frustrating searches!
Don’t forget to account for the mattress weight when calculating how much the lifting mechanism can handle. My king size memory foam mattress weighs about 35kg on its own, which means the pistons are already working hard before adding any storage items. Some premium ottoman beds come with enhanced gas lifts specifically designed for heavier mattresses—worth the extra investment if you’ve splashed out on a luxury mattress.
I’ve found that using storage containers that stack efficiently makes an enormous difference to capacity. Square or rectangular containers with flat lids utilize space much better than odd-shaped bags or round containers. Just remember to leave a small gap around the edges to prevent items catching when you lower the mattress. Learned that one when I trapped my favorite bedspread and ripped it. Gutted! Stop overloading your bed! Upgrade to our Ella Sunset Ottoman Bed Frame with enhanced hydraulic pistons designed for heavier storage needs. Stop overloading your bed! Upgrade to our Ella Sunset Ottoman Bed Frame with enhanced hydraulic pistons designed for heavier storage needs.
Creating Zones for Efficient Ottoman Bed Organization
I used to be the sort of person who’d just chuck everything under my ottoman bed with zero thought about organization. What a nightmare that turned out to be! After one particularly frustrating Sunday morning spent literally emptying the entire storage space to find a specific winter jumper, I finally saw sense and developed a proper system. Trust me, creating zones in your ottoman bed storage will save your sanity.
Before I even touched my bed storage, I dumped everything out on the bedroom floor (much to my partner’s horror) and started categorizing. It was proper embarrassing how much random stuff I’d accumulated! There were Christmas decorations mixed with summer clothes, important documents stuffed alongside old magazines, and even a forgotten birthday gift I’d bought for my sister months earlier. Mortifying.
The categorizing stage is absolutely crucial. Don’t skip it like I did the first time! Group similar items together—bedding with bedding, seasonal clothes with seasonal clothes, etc. I ended up with about seven distinct categories, which helped me visualize exactly what needed to go back into the ottoman and what could be rehomed elsewhere. Some stuff went straight in the bin, if I’m being honest.
For mapping out your storage zones, you need to think about how often you’ll need to access different items. My system now has three frequency zones: frequently accessed (monthly), occasionally accessed (seasonally), and rarely accessed (once or twice a year). This approach has been a game-changer for me.
Here’s my step-by-step process that might help you too:
- Draw a rough diagram of your ottoman bed storage area on paper. Nothing fancy, just a rectangle will do.
- Divide this rectangle into sections based on accessibility. For my side-lift ottoman, the areas closest to the opening edge are easiest to reach, so that’s where my frequent-use items go.
- Label each section with the category and frequency of use. I use sticky notes on my diagram so I can move things around if needed.
- Measure each zone and find appropriate storage containers that maximize the space. This bit is dead important—don’t waste valuable centimeters with ill-fitting boxes!
- Create a simple inventory list of what’s stored where. I keep mine taped to the inside of my wardrobe door. Sounds over the top, but it’s saved me countless frustrating searches!
Seasonal rotation has become a proper ritual in our house now. Every six months, usually April and October, I spend a Saturday morning rotating our bedding and clothes. In April, all the heavy winter duvets, electric blankets, and thick jumpers go into the ottoman, while summer clothes and lightweight bedding come out. Then in October, we swap them back.
Best Ottoman Beds for Small Bedrooms: Maximize Storage in Style 2025 Guide
What I’ve found super helpful is keeping these seasonal items in vacuum-sealed bags. They reduce the volume by about 70%, which is brilliant for bulky items like duvets. I made the mistake of not labeling them clearly the first time—ended up with five identical-looking vacuum bags and no idea what was in each! Now I use bright luggage tags with detailed descriptions.
The “one in, one out” rule has been absolutely essential for preventing my ottoman from becoming an abyss of forgotten items again. It’s dead simple: whenever I want to add something new to the storage, something else has to leave. This stops the gradual creep of clutter that used to plague me. My husband was skeptical at first but now he’s a total convert.
I learned this trick from a professional organizer’s blog—create a “pending” box somewhere else in your home (mine’s on top of the wardrobe). When you think you want to store something in the ottoman, put it in the pending box for a month first. If you don’t need it during that time, then it can go in the ottoman. If you do need it, it probably shouldn’t be stored away at all! This simple buffer system has prevented so many unnecessary retrievals.
A friend who works as a professional organizer shared her “rainbow method” with me, which I’ve adapted for my own use. She suggests organizing items by color within each category, which not only looks satisfying when you open the ottoman but makes finding specific items much easier. “Looking for your navy winter dress? Check the blue section of winter clothes!” Simple but effective.
Another zoning tip I’ve found helpful is to store related items together even if they’re from different categories. For example, I keep our guest bedroom items (spare pillows, sheets, and towels for visitors) all in one zone, even though technically they’re different types of items. This makes preparing for overnight guests so much easier—just grab everything from one section!
The most unexpected benefit of my zoning system has been the mental clarity it’s given me. There’s something dead satisfying about knowing exactly what you own and where it is. No more buying duplicate items because I couldn’t find the original or stressing about where I put something important. My ottoman bed is no longer a source of frustration but a properly organized extension of my storage system. Ready to implement your storage zones? Our Milla Moonshine Ottoman Bed Frame provides the perfect canvas for your organization system!
Best Storage Containers and Systems for Ottoman Beds
When I first started using my ottoman bed for storage, I made the classic rookie error of just shoving things in without proper containers. Big mistake! After a few months, everything was a jumbled mess, and I couldn’t find anything without emptying the entire bed. Talk about frustrating! Through loads of trial and error (and a fair bit of money wasted on containers that weren’t quite right), I’ve finally cracked the code on what works best.
Let’s chat about vacuum-sealed bags versus rigid containers, shall we? Both have their place in ottoman bed storage, but they serve completely different purposes. I’ve become a bit obsessed with vacuum bags for anything fabric-related—duvets, winter jumpers, spare pillows, and seasonal clothes. They’re absolutely brilliant for reducing bulky items to about a third of their original size. Last winter, I managed to compress two king-size duvets, three winter coats, and all our Christmas jumpers into just two large vacuum bags!
However, I learned the hard way that vacuum bags aren’t great for everything. I once stored my favorite cashmere sweater in one, and when I took it out six months later, it was properly creased with compression lines that took ages to drop out. Some fabrics just don’t bounce back well. And don’t even get me started on trying to vacuum-seal anything with buttons or zips—the sharp edges can puncture the bags if you’re not careful. Learned that lesson after finding my winter coat had created tiny holes in the bag, rendering the vacuum seal useless.
Rigid containers, on the other hand, are perfect for items that need protection or have odd shapes. I use them for storing photo albums, important documents, and smaller items that would get lost in a vacuum bag. The best ones for ottoman beds are shallow, wide varieties rather than deep boxes. My first storage boxes were too tall, which meant I couldn’t fit as many in the space and wasted loads of potential storage area.
After much experimentation, I’ve found that a combination works best—vacuum bags for bulky fabrics and rigid containers for everything else. The vacuum bags can be squished into odd spaces around the more structured boxes, making use of every available inch.
There are actually some brilliant specialized storage solutions designed specifically for ottoman beds that I wish I’d known about earlier! My favorite discovery has been underbed drawer dividers that are lower profile than regular drawer organizers. They’re only about 10cm high but have adjustable compartments, making them perfect for storing smaller items like scarves, belts, or accessories without wasting vertical space.
Another game-changer was finding ottoman bed storage bags with side handles positioned specifically for easy retrieval. Unlike regular storage bags where the handles are on top, these have handles on the sides so you can grab and pull them out horizontally. Absolute lifesaver when you’re reaching into the depths of your ottoman storage!
I’ve become a bit of a folding nerd since maximizing my ottoman bed storage. The standard folding technique I’d used my whole life was actually wasting tons of space! For bed linens, I now use the “file folding” method where everything stands vertically in the container rather than being stacked. This means I can see every set of sheets at once without unpacking everything. It’s proper satisfying to open a container and see all your linens neatly arranged like files in a drawer.
Top Space-Saving Ottoman Beds: Maximizing Small Spaces in 2025
For blankets and duvets that aren’t vacuum-sealed, I use the army roll technique I learned from a YouTube video. It’s dead simple—you fold the item into thirds lengthways, then roll tightly from one end, squeezing out air as you go. Not only does this save space, but it also prevents those annoying creases that come from folding.
Clothing has been revolutionized by the Marie Kondo folding method in my house. Even my husband, who used to just scrunch everything up, has been converted! The key is folding everything into neat rectangles that can stand upright. This way, you can fit nearly twice as many t-shirts or jumpers in the same space compared to traditional flat stacking.
When it comes to maximizing vertical space, stackable container systems are your best mate. I invested in a matching set of containers with flat lids specifically designed for stacking. The first containers I bought had slightly domed lids, which meant they wobbled when stacked and wasted space—not ideal! Now I use clear stackable containers with secure clip locks that keep everything dust-free and perfectly aligned.
The best tip I can share is to measure your ottoman bed’s internal height and then find containers that make the most of that height when stacked. For example, my bed has an internal height of 26cm, so I use three 8cm containers stacked together, which fits perfectly with a tiny bit of clearance to make opening and closing smooth.
For those on a budget (like I was after spending too much on my fancy new bed), there are loads of DIY storage solutions using stuff you probably already have at home. Old shoeboxes make brilliant drawer dividers when covered with pretty wrapping paper or fabric. I’ve used them to separate different categories of items within larger containers—one for summer socks, one for winter socks, etc.
Another budget hack I’m chuffed with is using old pillowcases as storage bags for sets of bedding. I simply fold the fitted sheet, flat sheet, and pillowcases and then store the whole set inside a pillowcase from the same set. Everything stays together, and it costs absolutely nothing!
Wine boxes from the supermarket have been another free storage solution. They’re surprisingly sturdy, have built-in dividers, and are the perfect height for most ottoman beds. I’ve used them for storing everything from rolled-up t-shirts to winter accessories. A bit of decorative tape around the edges makes them look less like you’ve nicked them from Tesco!
The most important thing I’ve learned about ottoman bed storage containers is that consistency is key. Using the same type and brand of container whenever possible means everything fits together like a puzzle, with no wasted gaps or awkward spaces. It might cost a bit more upfront, but the space efficiency is worth every penny in the long run. Maximize your storage potential with our Emily Moonshine Ottoman Bed Frame – designed with optimal internal dimensions for standard storage containers!
Organizing Seasonal Clothing and Bedding
I used to dread the seasonal wardrobe switch. My tiny London flat simply doesn’t have enough wardrobe space for both my summer and winter clothes to hang at the same time. Before I got my ottoman bed, I’d stuff off-season clothes into those vacuum bags and shove them on top of the wardrobe, where they’d inevitably get dusty and forgotten. Half the time, I couldn’t even remember what I owned! The whole process was a proper faff.
Getting my king size ottoman bed three years ago changed everything. Now I’ve got a brilliant rotating system that works like clockwork twice a year. I typically do the big switch in early April and again in late September—these dates work perfectly for the British weather, which let’s face it, can be a bit unpredictable!
My system isn’t complicated, but it does require a bit of prep work. At the end of each season, I do a ruthless clear-out before anything goes into storage. If I haven’t worn something that season, it doesn’t deserve precious ottoman space! This rule has saved me from hoarding clothes I don’t actually like. Last winter, I realized I’d been storing the same jumper for three years without wearing it once. Madness!
For the actual rotation, I’ve divided my ottoman bed into two main sections: the “current season” zone (which stays empty to receive items from the next switch) and the “stored season” zone. This way, I always know exactly where to find my off-season gear when the weather suddenly changes. You know how British weather can go from scorching to freezing in a day!
The folding techniques I’ve learned have been absolutely game-changing for preventing those horrible storage wrinkles. For most clothing, I use the KonMari method—not because I’m obsessed with tidiness (my partner would laugh at that suggestion!), but because it genuinely works brilliantly for storage. Folding items into small rectangles that stand upright means I can see everything at once without rummaging.
For delicate items like silk blouses or linen trousers that wrinkle easily, I’ve found that tissue paper is my best friend. I place acid-free tissue between folds to prevent sharp creases from forming. Seems fussy, but it’s worth it when you pull out your favorite linen dress and it doesn’t need ironing before you can wear it!
Knitwear needs special attention—I learned this after finding my favorite cashmere jumper had developed shoulder bumps from being folded incorrectly. Now I fold jumpers with the sleeves wrapped around the body first, which maintains their shape beautifully. For extra-special knitwear, I use small pieces of acid-free tissue in the folds and never stack anything heavy on top.
Moisture control is something I became obsessed with after finding a slightly musty smell on my stored clothes one year. Absolutely mortifying! The problem with ottoman beds is that they don’t have much airflow, which can lead to dampness issues, especially in British homes that tend to be a bit humid.
How to Clean and Maintain Your Ottoman Bed: Complete Care Guide 2025
My solution was two-fold: first, I make sure everything is completely dry before storing it. Seems obvious, but I once packed away a jumper that was ever so slightly damp from being near an open window during rain, and it developed mildew spots. Lesson learned!
Secondly, I’ve become best mates with silica gel packets. I save these little moisture-absorbing packets from everything—new shoes, handbags, electronics—and pop them into my storage containers. For larger containers, I buy dedicated moisture absorbers from the pound shop. They’re cheap as chips and work brilliantly. I replace them every six months during the seasonal switch.
Cedar blocks have also been brilliant for keeping clothes fresh and deterring moths. I had a nasty surprise two years ago when I found tiny holes in my wool coat—those little moth blighters had had a proper feast! Now I place cedar blocks throughout my storage containers, refreshing them with cedar oil occasionally to keep them effective.
The labeling system I’ve developed makes seasonal switches practically effortless. I used to just scribble on storage bags with marker pen, but the writing would often fade or smudge. Now I use proper luggage-style tags attached to each container with detailed lists of contents. For vacuum bags that might be hard to identify, I include a small photo of the main items inside—a trick I picked up from a professional organizer’s Instagram.
I also keep a master inventory in the Notes app on my phone, listing exactly what’s stored where. Sounds over the top, but it’s saved me from unnecessary unpacking so many times! When I suddenly need my thick cardigan during an unexpected cold snap in May, I know exactly which container to grab.
Storing bulky winter items like duvets and coats used to be my biggest headache. These items take up so much space! Vacuum bags have been my savior here—they reduce the volume of my winter duvet by about 75%. The first time I used one, I couldn’t believe how small it became! Just remember to store the vacuum attachment somewhere obvious, or you’ll be stuck when it’s time to re-inflate everything (learned that one the hard way).
For winter coats, I’ve found that rolling rather than folding works best to prevent awkward creases. I clean them properly before storage, button them up, and then roll from the bottom up, keeping the shoulders as smooth as possible. My wool coats get special treatment with moth-repellent bags and cedar hangers.
One space-efficient trick I’ve discovered for storing multiple duvets is the “Swiss roll” method. You layer the duvets on top of each other, then roll them together into one tight bundle secured with wide straps. This creates one manageable package rather than several awkward ones. The first time I tried this, I managed to fit our winter duvet, guest duvet, and two spare blankets in the space previously taken up by just the winter duvet!
The most important thing I’ve learned about seasonal storage is to give yourself enough time to do it properly. My first attempt was a rushed Sunday evening affair that resulted in creased clothes and forgotten items. Now I block out a full Saturday morning twice a year, put on some good music, and make it an enjoyable ritual rather than a chore. Taking the time to store things correctly means everything is in perfect condition when you need it again—no last-minute ironing or disappointed discoveries of damaged clothes.
And here’s my final tip—always leave a bit of extra space in your ottoman for those odd seasonal items you might forget about. Last year I completely filled my storage, only to remember my winter boots were still at the back of the wardrobe! A bit of breathing room means you can add those last-minute items without reorganizing everything. Trust me, your future self will thank you for it! Keep your seasonal items pristinely stored in our Isabelle Star Ottoman Bed Frame with moisture-resistant base materials!
Smart Solutions for Storing Documents and Valuables
I never thought I’d become the sort of person who gets excited about document storage, but here we are! After a minor disaster involving a leaky ceiling and some important paperwork stored in a cardboard box, I’ve become rather passionate about proper document storage in my ottoman bed. That moment of finding my university degree certificate with water damage was proper gutting, I can tell you!
Creating a secure filing system within your ottoman bed storage isn’t just about throwing papers in a box and hoping for the best (my previous “system”). I’ve learned that with a bit of thought, you can create something that’s both secure and incredibly practical. The ottoman bed is actually brilliant for important documents because it’s not an obvious storage location for potential thieves—much better than the classic “important papers in the desk drawer” approach!
My current system uses a combination of waterproof document boxes and expanding files, all neatly labeled and organized by category. I’ve got separate sections for financial documents, household paperwork, personal documents, and sentimental items. The game-changer was investing in a proper fireproof and waterproof document box for the most critical items—birth certificates, passports, insurance policies, and the like. It was a bit pricey (about £40), but the peace of mind is worth every penny.
One mistake I made early on was using plastic document wallets that were too flimsy. They tore easily and didn’t provide enough protection. I’ve since upgraded to thicker poly envelopes with secure closures that don’t gape open when full. The slight extra cost makes a massive difference in durability.
For protecting documents from moisture, which can be a concern with under-bed storage, I’ve become a bit obsessed with silica gel packets. I collect them from everything—new shoes, electronics, vitamin bottles—and pop them into my document boxes. Sounds a bit mad, but they work brilliantly at keeping everything bone dry. I also bought some larger moisture absorbers specifically for my document storage area after reading horror stories about mold damaging important papers.
Ottoman Beds vs Alternative Bedroom Storage: Comprehensive Comparison 2025
The location within your ottoman bed matters too! I learned the hard way that the area near the foot of the bed, where the lifting mechanism is, can sometimes get tiny amounts of lubricant drips over time. After finding a small oily mark on one document box, I now keep all paperwork away from the mechanical parts of the bed. Seems obvious in hindsight!
My system for warranties and manuals used to be nonexistent—they’d just get stuffed in a kitchen drawer and forgotten about. Now I’ve got a dedicated expanding file just for them, organized by room rather than alphabetically. This makes so much more sense! When the washing machine goes wonky, I can grab the “Kitchen Appliances” section rather than trying to remember the brand name to look up alphabetically.
One of my cleverest ideas (if I do say so myself) was creating a “pending” section for paperwork that needs action. Before, important letters requiring responses would get lost in the filing system. Now they go in a bright red folder at the front of my document box until dealt with. No more missed deadlines or forgotten bills!
For warranties and instruction manuals, I’ve started being much more selective about what I keep. Most manuals are available online now, so I only store physical copies of items where the warranty requires the original documentation or for appliances that are complicated to operate. This has reduced my paperwork by about half! For the manuals I do keep, I write the purchase date directly on the front cover so I know at a glance how old the item is and whether it’s still under warranty.
Storing valuables and sentimental items requires extra thought. While the ottoman bed is generally secure (it’s not the first place a burglar would look), I wouldn’t recommend storing extremely valuable jewelry or large amounts of cash there. For moderately valuable items with sentimental value—like my grandmother’s costume jewelry or old family photographs—I use acid-free boxes with cotton padding.
I learned about acid-free storage the hard way after finding some old family photos had started to discolor where they touched a regular cardboard box. Now anything truly sentimental gets proper archival-quality storage materials. They’re a bit more expensive, but irreplaceable items deserve the extra protection.
For items that are both valuable and sentimental, like my wedding jewelry, I’ve created a “hidden” storage area within the larger ottoman space. It’s essentially a smaller lockbox tucked inside a larger, more ordinary-looking storage container labeled “Winter Scarves.” Not Fort Knox level security, but it provides an extra layer of protection and isn’t obvious at first glance.
One thing I wish I’d known earlier is how temperature fluctuations can affect certain items. The space under your bed can get quite warm, especially with memory foam mattresses that retain heat. I discovered this isn’t ideal for storing things like old photographs or certain types of collectibles. Now I keep truly irreplaceable photos in a proper photo storage box in a cooler part of the house and only use the ottoman for copies or less temperature-sensitive items.
The digital alternative route has been a proper game-changer for reducing my physical document storage. I spent one rainy Sunday scanning all my important documents using my phone’s scanner app and storing them securely in encrypted cloud storage. Now I only keep the original physical copies of absolutely essential legal documents—birth certificates, property deeds, etc.—and have digital backups of everything.
For less critical but still important documents like utility bills and bank statements, I’ve gone completely paperless. Most companies offer this option now, and it’s made a massive difference to my paper clutter. Just remember to create a good digital filing system with clear folder names and regular backups! I learned that lesson after spending ages trying to find a specific electricity bill in my downloads folder.
My most recent discovery has been apps specifically designed for warranty tracking. I use one that lets me photograph the receipt and warranty information, set expiry reminders, and even store photos of the serial numbers. This means I can access warranty info instantly if something breaks, rather than digging through physical files. Absolute lifesaver when my laptop charger packed up while I was visiting my parents!
If you’re concerned about security but still want to use your ottoman bed for document storage, consider a false bottom in one of your storage containers. I created one using a piece of cardboard cut to size, covered with the same fabric as the container lining. Small valuables or confidential documents can be hidden underneath, with more ordinary items stored on top. Not exactly James Bond level security, but it provides an extra layer of privacy from casual snooping.
The key thing I’ve learned about document storage is that regular maintenance prevents it from becoming overwhelming. I schedule a quick 30-minute review every three months to file new documents, shred anything that’s no longer needed, and check that everything is still well-organized. This simple habit has kept my once-chaotic paperwork under control and given me one less thing to stress about! Protect your important documents with our Amelia Nocturne Ottoman Bed Frame featuring a fully sealed storage compartment!
Organizing Children’s Items and Toys
When my first little one arrived, I was completely unprepared for the sheer amount of STUFF that comes with having children! One minute our home was a stylish, minimalist haven, and the next it was overrun with colorful plastic toys, tiny clothes, and more stuffed animals than I could count. My ottoman bed quickly became my secret weapon in the battle against kiddie clutter!
I’ve learned through trial and error (mostly error, if I’m honest) that organizing children’s items requires completely different strategies depending on their age. When my son was a baby, I needed frequent access to different sizes of clothing as he grew at an alarming rate. I made the mistake of storing his “next size up” clothes at the very back of the ottoman storage, which meant a complete reorganization every few months when he suddenly outgrew something at 2 am!
Now I use clear stackable containers with adjustable dividers specifically labeled by size AND season. Each container has items from multiple size ranges, organized in order from smallest to largest, so I can easily grab the next size when needed. I also keep a small “emergency” box with a few items in the next size up in a more accessible location—this has saved me from many middle-of-the-night panics when I’ve discovered his sleepsuit suddenly doesn’t fit!
For toddlers and preschoolers, I’ve found that toy rotation is absolutely essential for maintaining my sanity. My ottoman bed has become toy rotation central! I divide toys into roughly four collections, keeping one collection out for play and the other three stored in the ottoman. Every couple of weeks, we have a special “new toy day” where we swap the collections. My son gets excited about rediscovering toys he hasn’t seen for a while, and I don’t have to trip over 500 toys scattered across every surface. Win-win!
15 Best Minimalist Ottoman Beds for 2025: Clean Lines Meet Smart Storage
The first time I tried toy rotation, I made the rookie error of not documenting what was in each collection. This led to the “where’s the red fire engine?” crisis of 2022, which involved emptying the entire ottoman storage while my toddler had a meltdown. Not fun! Now I keep a simple inventory list taped to each container, and I take a quick photo of the contents on my phone before storing them away. Proper lifesaver!
For primary school-aged children, I’ve created a system that encourages more independence. Each category of toy has its own clearly labeled container with a photo of what goes inside, so my son can help with tidying up and can request specific toys from the ottoman storage. We have special containers for LEGO, toy cars, action figures, and craft supplies. The clear containers mean he can see what’s inside without having to open everything.
One of the trickiest aspects of children’s storage is planning for growth. Kids’ interests and needs change so rapidly! I’ve learned to use flexible storage solutions that can adapt as my children grow. Rather than buying containers specific to one type of toy (like a special LEGO storage box), I opt for versatile options that can be repurposed later. Those divided containers that once held baby socks and mittens now organize small collectible toys perfectly!
I reassess our storage system every six months or so, usually coinciding with a pre-birthday or pre-Christmas clear-out. This helps prevent the ottoman from becoming a dumping ground for outgrown or forgotten items. We have a rule in our house—for every new toy that comes in, an old one needs to find a new home, either donated or stored if it has sentimental value. It’s not always easy to enforce with a tearful child, but it keeps things manageable!
Safety is a massive consideration when using ottoman beds for children’s storage. After a scary incident where my toddler nearly got his fingers caught in the lifting mechanism, I’ve become super vigilant about safety. The main rule is that children are NEVER allowed to open or close the ottoman bed themselves—this is strictly an adult job. I’ve explained the dangers in age-appropriate terms, and so far, this boundary has been respected.
Another safety tip I’ve learned is to avoid storing anything in the ottoman that might be needed in an emergency. Medications, first aid supplies, and comfort items for middle-of-the-night wake-ups are stored elsewhere. There’s nothing worse than trying to wrestle open an ottoman bed at 3 am while dealing with a sick child!
For items that children might want to access independently, I use a different storage solution, reserving the ottoman for parent-accessed items or seasonal rotation. This prevents the temptation for little ones to try opening the bed themselves. The last thing you want is a child attempting to lift a heavy ottoman mechanism!
Stuffed animals have been my biggest storage challenge—they’re bulky, oddly shaped, and my children seem to have emotional attachments to every single one! After trying various solutions, I’ve found that vacuum storage bags work brilliantly for the “B-team” soft toys (those that are liked but not currently in the favorite rotation). The first time I vacuum-sealed a bag of stuffed animals, I was proper amazed at how much space it saved—about 75% smaller!
For the organizing of books, I’ve learned that standard storage boxes often waste space. Instead, I use underbed book caddies specifically designed to maximize the number of books while keeping them accessible. These caddies have dividers that allow books to stand upright, making it easy to see what you have without unpacking everything. For seasonal or age-specific books (like Christmas stories or baby board books), I rotate these collections using labeled fabric bins.
Board games presented another storage challenge with their awkward, bulky boxes. My solution was to ditch many of the original boxes (controversial, I know!) and transfer the contents to stackable plastic containers. I cut out the instructions and game image from the original box and tape them to the new container. This method has reduced our board game storage space by about 40%! For special or collector’s edition games, I keep the original boxes stored flat at the bottom of the ottoman.
One of my cleverest storage hacks (if I do say so myself) has been using hanging shoe organizers cut to size for storing small toys with many pieces. These fit perfectly in the ottoman and keep sets together—one pocket holds all the Play-Doh tools, another contains the doctor kit items, and so on. This prevents the frustrating problem of incomplete sets when toys have multiple small parts.
Growth planning has become second nature now. I try to think at least one year ahead when organizing children’s items. For example, I know my daughter will likely start showing interest in arts and crafts soon, so I’ve already designated a section of the ottoman storage for these supplies, even though we haven’t accumulated many yet. This forward-thinking prevents major reorganization projects every few months.
Labeling is absolutely essential when organizing children’s items, especially if you have multiple children! I use color-coded labels—blue for my son’s items, purple for my daughter’s, and green for shared items. This simple system makes it easy to find what I need quickly. For pre-readers, I add pictures to the labels so they can help find their own things.
Perhaps my favorite discovery has been “outfit bundling” for seasonal clothing storage. Instead of storing all tops in one container and bottoms in another, I bundle complete outfits together with small elastic bands. When the season changes, I can quickly grab ready-made outfits rather than hunting for matching items. This has been a proper game-changer for hectic school mornings!
The most important lesson I’ve learned about organizing children’s items is flexibility. What works perfectly at age three might be completely useless by age four! Creating a system that can evolve alongside your children saves so much time and frustration in the long run. My ottoman bed storage has changed its organization at least six times in four years, and I expect it’ll change many more times as my children grow and their needs change. And that’s perfectly fine—the best storage systems grow with your family! Need a safe storage solution for your growing family? Our Leah Snooze Ottoman Bed Frame features child-safe mechanisms and rounded corners!
Maintaining Your Organized Ottoman Bed Storage
Let me tell you something—getting your ottoman bed organized is only half the battle. Keeping it that way? That’s where the real challenge begins! I learned this lesson the hard way after spending an entire weekend perfectly organizing my ottoman storage, only to find it in complete disarray just three months later. I couldn’t even close the bed properly because things had shifted about so much!
Establishing a regular maintenance schedule has been absolutely crucial for keeping chaos at bay. At first, I was a bit skeptical about scheduling time specifically for “ottoman maintenance”—it sounded a bit obsessive even to my organization-loving ears. But without a schedule, it’s dead easy to fall into the trap of just quickly shoving things in “temporarily” and promising yourself you’ll sort it properly later. Spoiler alert: later never comes!
My current system involves three levels of maintenance: daily quick checks, weekly mini-sessions, and seasonal deep dives. This might sound like a faff, but I promise it takes far less time than dealing with a completely disorganized storage space once it’s gone to pot!
For daily maintenance, I have one simple rule: nothing goes into the ottoman without being properly contained and labeled. No loose items, no “I’ll just quickly put this in there for now” moments. This tiny habit has made an enormous difference! It takes literally seconds to put something in its proper container rather than just chucking it in, but saves hours of reorganizing later. I keep a few empty containers and labels in my bedside table for any unexpected storage needs.
The weekly mini-session is my secret weapon for preventing slow-creeping disorganization. Every Sunday evening, I spend about 10-15 minutes quickly checking that everything is still in its proper place, containers are closed properly, and nothing has shifted around too much. I also use this time to update any inventory lists if I’ve added or removed items during the week. It’s become a bit of a relaxing ritual, actually—sometimes I’ll have a cup of tea and put on a podcast while I do it.
My first attempt at a maintenance schedule was way too ambitious—I tried to do a complete reorganization every month, which was completely unnecessary and, frankly, exhausting. Now I save the big efforts for seasonal changes, which makes much more sense for how we actually use our storage.
The seasonal deep-cleaning sessions are more involved but absolutely worth the effort. Four times a year (usually when the seasons change), I schedule about 2-3 hours to completely empty the ottoman, clean the interior thoroughly, check for any moisture or pest issues, and reorganize as needed. This is also when I rotate seasonal items like clothing and bedding.
During these seasonal sessions, I’ve found it’s essential to completely empty the ottoman rather than trying to clean and reorganize one section at a time. The first time I tried the section-by-section approach, I ended up just shifting mess from one area to another! Now I lay everything out on the bed and floor (much to my partner’s annoyance), clean the empty storage space, and then return items in a logical order.
One cleaning tip I wish I’d known earlier—vacuum the ottoman storage area before wiping it down. There’s always a surprising amount of dust, fluff, and mysterious crumbs that accumulate in there! I use the upholstery attachment on my vacuum cleaner to get into the corners, then follow up with a slightly damp microfiber cloth. For stubborn marks, a bit of mild soap on the cloth works wonders, but be sure to dry the area thoroughly afterward to prevent any moisture issues.
Speaking of moisture, this is one of the biggest challenges with ottoman bed storage. During one seasonal clean, I discovered slight condensation in one corner of my ottoman—proper scary when you’ve got important documents stored there! Now I place moisture absorbers in each corner of the storage area and replace them during my seasonal maintenance. They’re cheap as chips from the pound shop and provide great peace of mind.
Another common challenge is container creep—when boxes and bags slowly shift around as you open and close the ottoman. This can prevent the bed from closing properly or make it difficult to access certain items. My solution has been to use non-slip shelf liner cut to fit the bottom of the ottoman storage area. The containers sit on this and are much less likely to slide around. Game-changer!
Weight distribution is another issue that needs regular checking. I once made the mistake of storing all my heaviest items on one side of the bed, which eventually caused the lifting mechanism to become slightly lopsided. During maintenance sessions, I now make sure weight is evenly distributed across the storage area. This not only helps the mechanism work properly but also prevents unnecessary strain on the bed frame.
Adapting your system as storage needs evolve is perhaps the most important aspect of maintenance. When I first organized my ottoman, I was storing primarily out-of-season clothing and spare bedding. Two years and one child later, my storage needs had completely changed! I was trying to force toys, baby clothes, and keepsakes into a system designed for something entirely different.
Don’t be afraid to completely overhaul your system if it’s no longer working for you. I now reassess my overall organization scheme during the spring seasonal maintenance, considering what’s changed in our lives and what’s likely to change in the coming year. This annual review prevents the frustration of working with an outdated system.
One brilliant adaptation I’ve made is creating a “transition zone” in my ottoman storage. This is a specific container for items that are in flux—things that might need to be stored elsewhere eventually but need a temporary home. Having this designated area prevents random items from cluttering up my otherwise organized system while I decide their fate.
For common organization challenges, I’ve developed a few troubleshooting strategies. When containers won’t fit properly despite measuring carefully (this happens more often than you’d think!), I keep a supply of vacuum bags handy to compress soft items and create more space. For containers that are difficult to access, I’ve added fabric pull tabs to make them easier to grab.
Label issues are another common problem—they fall off, become illegible, or simply don’t provide enough information. After trying various labeling methods, I’ve settled on waterproof vinyl labels attached with strong adhesive for permanent containers, and hanging tags for items that change seasonally. I also take photos of container contents and keep them in a dedicated album on my phone—this has saved me countless times when trying to locate specific items!
15 Essential DIY Ottoman Bed Maintenance Tips for 2025: Extend Your Bed’s Lifespan
Perhaps the most frustrating challenge is other household members not following the system. My partner was initially hopeless at maintaining our ottoman organization, regularly shoving things in without containers and ignoring the carefully planned zones. Rather than constantly nagging (which wasn’t working anyway), I simplified his part of the system and created an “incoming” box just for him. He puts items in this box, and I sort them properly during my weekly maintenance. Not perfect, but a workable compromise!
As your storage needs evolve, don’t be afraid to invest in new containers or dividers that better suit your current situation. I started with a mishmash of containers I already had, which worked fine initially. But as our storage became more complex, I gradually replaced them with a coordinated system of stackable containers that maximized our space. The initial cost was worth it for the frustration it saved!
Technology has become a brilliant ally in maintaining my ottoman organization. I use a simple inventory app on my phone to track what’s stored where, which has eliminated the “I know it’s in here somewhere” rummaging sessions. Some apps even let you photograph items and containers, making it even easier to find things quickly.
My final piece of advice for maintaining ottoman bed storage is to be realistic about what belongs there. Not everything is suited to this type of storage, and forcing unsuitable items into the system will only create headaches later. Items needed very frequently, extremely heavy things, or anything that could be damaged by limited air circulation might be better stored elsewhere.
Maintaining your ottoman bed storage doesn’t have to be a massive chore if you build small habits into your routine. Those few minutes of regular maintenance save hours of frustrated searching and reorganizing later on. Trust me, your future self will be incredibly grateful for your current self’s organizational diligence! Keep your organization system pristine with our Lizzy Ottoman Upholstered Bed Frame featuring easy-clean interior surfaces!
Conclusion
Your king size ottoman bed is truly a storage superhero in disguise! By implementing the smart organization systems we’ve explored—from strategic zoning to specialized containers—you can transform that underutilized space into an organizational powerhouse. Remember, the key to success lies in creating a personalized system that works with your specific needs and lifestyle. Don’t be afraid to experiment until you find the perfect arrangement! Start small, be consistent with your maintenance routine, and watch as your bedroom becomes more spacious and serene.
Ready to lift that ottoman and get started? Your organized oasis awaits—and trust me, there’s no better feeling than knowing exactly where everything is while enjoying the clean, clutter-free bedroom of your dreams! Transform your bedroom today with our bestselling Sophia Ottoman Bed Frame and enjoy the perfect balance of comfort and organization!